CURING THE GOURD
One of theach most important things to do with a new mate, particularly if it is made from a natural material like calabash, is to cure it. Curing the cup seals it and prepares it for drinking, and if done properly allows the gourd to be used for a very long time. Over the years I have come across a few elaborate methods of curing gourds, but here at UruShop we recommend keeping the process simple. For myself following the steps below has always resulted in well cured calabash, but before you get started, here are a couple of things to look out for.
Firstly if you have encountered a gourd which looks like either of the pictures above or below do not worry! The gourd pictured above with extra fruit pith inside can be easily and carefully scooped out once the first part of the curing process is complete. What at first seems to be the presence of mould in the second image is just some natural colouring, and this will become unnoticeable once the gourd is cured. If mould does grow in your calabash after curing then pass salt around the inside, rinse out and allow to dry naturally.


AFTERCARE
You will get many years of use out of a calabash gourd so long as some basic fundamentals are observed.- Never leave yerba leaves sitting inside the gourd for too long after the session has finished. Try and empty it as soon as possible.
- Let your gourd dry properly in between uses. After rinsing them fully I tend to put mine on the kitchen windowsill. In the winter I sometimes use some kitchen paper to gently dab the walls of the cup to help quicken the drying process.
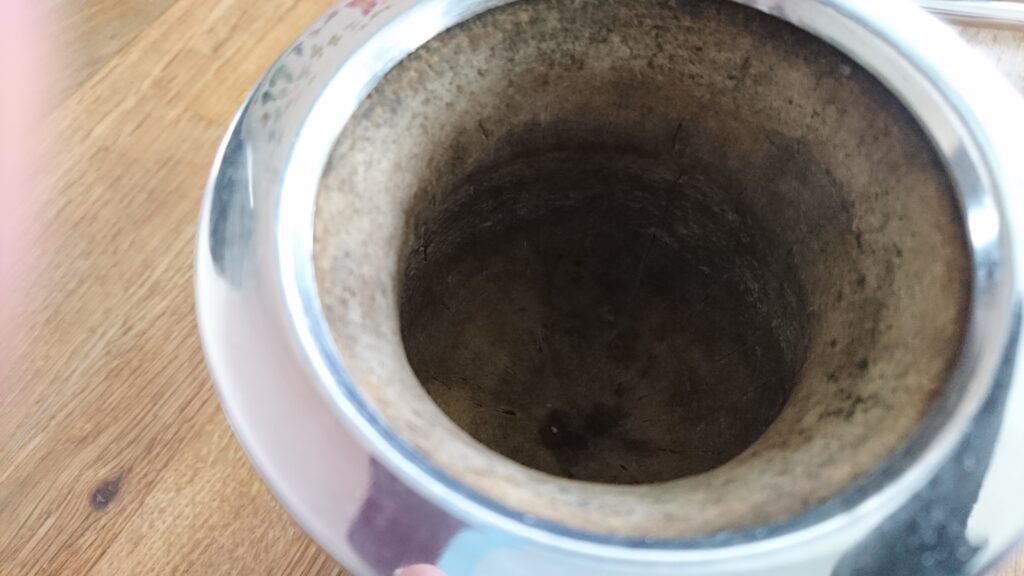
- You may notice after a few uses that the inside of your gourd starts to take on a darker colour (see below). This is perfectly normal, and you may observe that the cup undergoes subtle alterations in colour over time. Green and black is fine, but do watch for fluffy-white mould. If this occurs carry out the steps noted above.