Yerba Mate Article
Curing and Looking After Your Yerba Mate Gourd
Curing and Looking after your Yerba Mate Gourd
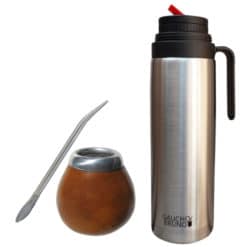
What is a ‘Mate’? The Mate is a cup from which to drink Yerba Mate. There are 4 main types of Mate Cup:
-
Natural (yerba mate gourd)
-
Wooden
-
Glass, Ceramic, Synthetic
- Guampa (horn)
Below for each type of mate is some general information, how to treat your mate when you first receive it, and ongoing advice for its care.
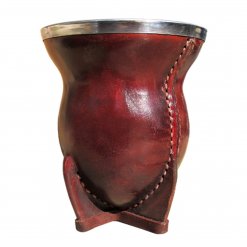
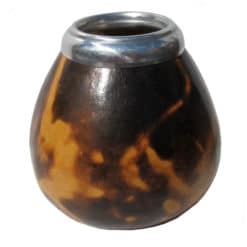
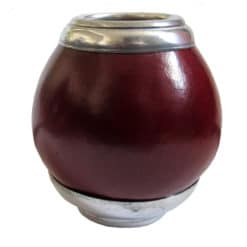
The Natural Yerba Mate Gourd
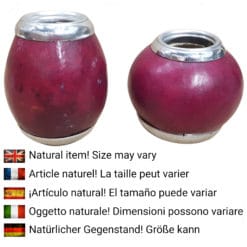
What is a Yerba Mate Gourd? It is formed by drying out a gourd, which is the fruit of the Calabash plant or tree, and hollowing it. There are a few varieties so the type of shape may vary. Often they are decorated on the outside, or maybe wrapped in leather or cloth. Sometimes they have metal rims and stands if they don’t stand alone. Here you see one growing
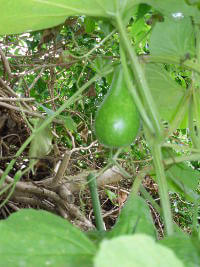
Yerba Mate Gourd
Still Growing
Why should I cure my yerba mate gourd?
Curing your mate if done properly should prevent the gourd from splitting. The gourd itself adds to the flavour of your brew, and the curing process improves the flavour and lengthens the flavourful life of the gourd.
How do I cure my yerba mate gourd?
We recommend the following procedure to cure a gourd:
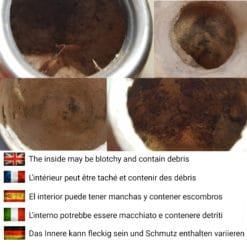
- Remove any debris With a natural yerba mate gourd it is perfectly normal for there to be ‘paper’ like debris inside, and possibly some seeds (imagine that when growing, the gourd is like a pumpkin or butternut squash). The inside maybe slightly black. Wash out the gourd with warm water – no soap – and scrape the debris out with a spoon. If the gourd is a pear shaped one, DO NOT REMOVE THE ‘BUD’ – this will cause leakage.
- Disinfect (optional) Pass salt around the inside. The salt acts as a disinfectant. This step is also helpful for later on – if your gourd develops a mould you can remove and disinfect for peace of mind.
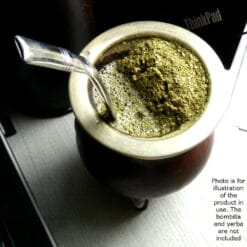
- Cure Fill the yerba mate gourd with old, used yerba tea leaves and leave for a few hours. If you don’t have any used yerba, you can use split teabags, or soak some fresh yerba in water and use that. It is important that the yerba/tea is just wet, DON’T FILL THE GOURD AND LEAVE SOAKING IN WATER, this will often lead to the gourd splitting. Some people add alcohol to the wet yerba (any alcohol will do) – this is optional.
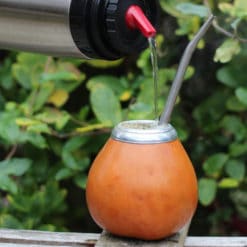
- Ready for use! You can now prepare a normal mate. Over time the yerba mate gourd will absorb more and more flavour of your yerba.
Ongoing care of your yerba mate gourd
It is important that after use you remove used yerba and keep your gourd dry, otherwise mould is likely to form. Never leave your gourd soaking in water, this will cause it to split.
The wooden mate
Wood is a popular material for mate cupas mainly because the flavour can be enhanced. Wooden mates usually give a richer enhancement to the taste, sometimes sweeter, as opposed to the gourd which is bitter.
Why should I cure my wooden mate?
Wooden mates are very prone to splitting, especially the palo santo wood. Curing the wood will help to seal the natural pores and increase the product life.
How do I cure my wooden mate?
- Seal the pores Spread oil or butter around the inside walls of the mate cup
- Cure Fill the mate with old, used yerba tea leaves and leave for a few hours. If you don’t have any used yerba, you can use split teabags, or soak some fresh yerba in water and use that. It is important that the yerba/tea is just wet, DON’T LEAVE SOAKING IN WATER, this will often lead to the splitting. Some people add alcohol to the wet yerba (any alcohol will do) – this is optional. After it has been left for at least a few hours, clean thoroughly to remove the yerba and oil.
- Ready for use! You can now prepare a normal mate. Over time the gourd will absorb more and more flavour
Ongoing care of your mate
It is important that after use you remove used yerba and keep your mate dry, otherwise mould is likely to form. Never leave your gourd soaking in water, this will cause it to split. Don’t allow to over dry, this will cause splitting. The best way to allow to dry is to shake out all excess water and dry pointing down on a drying rack. Don’t leave to dry on a radiator.
Ceramic, glass or synthetic mates
These kind of mate cups don’t require curing, but should be washed before use. They can be treated like normal crockery but depending on the outer material mmay need to be carefully washed e.g. If wrapped in leather.
The Guampa – horn
The guampa is popular in Paraguay and is a mate cup made from hollowed out bull’s horn. Its famous arching shape is iconic, and often comes with a keyring or hook fixture so it can be attached to the outside of a bag.
Why should I cure my guampa?
Curing the guampa will prevent splitting, but also disinfect the raw horn material.
How do I cure my guampa?
- Wash/disinfect Wash well with detergent
- Cure Fill the mate with old, used yerba tea leaves and leave for a few hours. If you don’t have any used yerba, you can use split teabags, or soak some fresh yerba in water and use that. It is important that the yerba/tea is just wet, DON’T LEAVE SOAKING IN WATER, this will often lead to the splitting. Some people add alcohol to the wet yerba (any alcohol will do) – this is optional. After it has been left for at least a few hours, clean thoroughly to remove the yerba and oil.
- Ready for use! You can now prepare a normal mate.
Ongoing care of your mate
It is important that after use you remove used yerba and keep your mate dry. Never leave your guampa soaking in water, this will cause it to split. Don’t allow to over dry, this will cause splitting. The best way to allow to dry is to shake out all excess water and dry pointing down on a drying rack. Don’t leave to dry on a radiator
Simple steps to easily cure your mate gourd.
- Remove debris from inside the cup, if there is any.
- (Optional) Pass salt around the inside. The salt acts as a disinfectant.
- Fill the mate gourd with used yerba leaves (If you dont have used yerba leaves, you can soak some fresh yerba in water and use that)
- Let the gourd sit filled for a day.
- Remove all the yerba leaves and clean the inside of the mate gourd with boiling water.
- Let gourd dry.
- Now you are ready to enjoy yerba mate!